
HELLOOOO!!!1
Welcome to the Dress My Craft blog. It's Anita here with a super awesome wall clock project that can be made so quickly and makes an amazing gift item, all handmade by you.
Dress My craft has some awesome range of miniatures, mulberry flowers and many other products that makes crafting so much fun.
You can visit the store HERE to check the entire collection.
Today , I have a Wall clock made with the Teenie Weenies paper, Stencils and Miniatures.
This is a picture heavy post so do spare some time to go through the pictures.
This is a 10x12 inch wall clock made on a MDF board. The look is that of a shelf with little flower baskets, cake and cake stand , mini bottles filled with pearls etc. All the product details are given below. This project can be framed and used in a living room, kitchen or any other area of the house and looks very pretty indeed.


 4. Adhere the paper on the board as above.


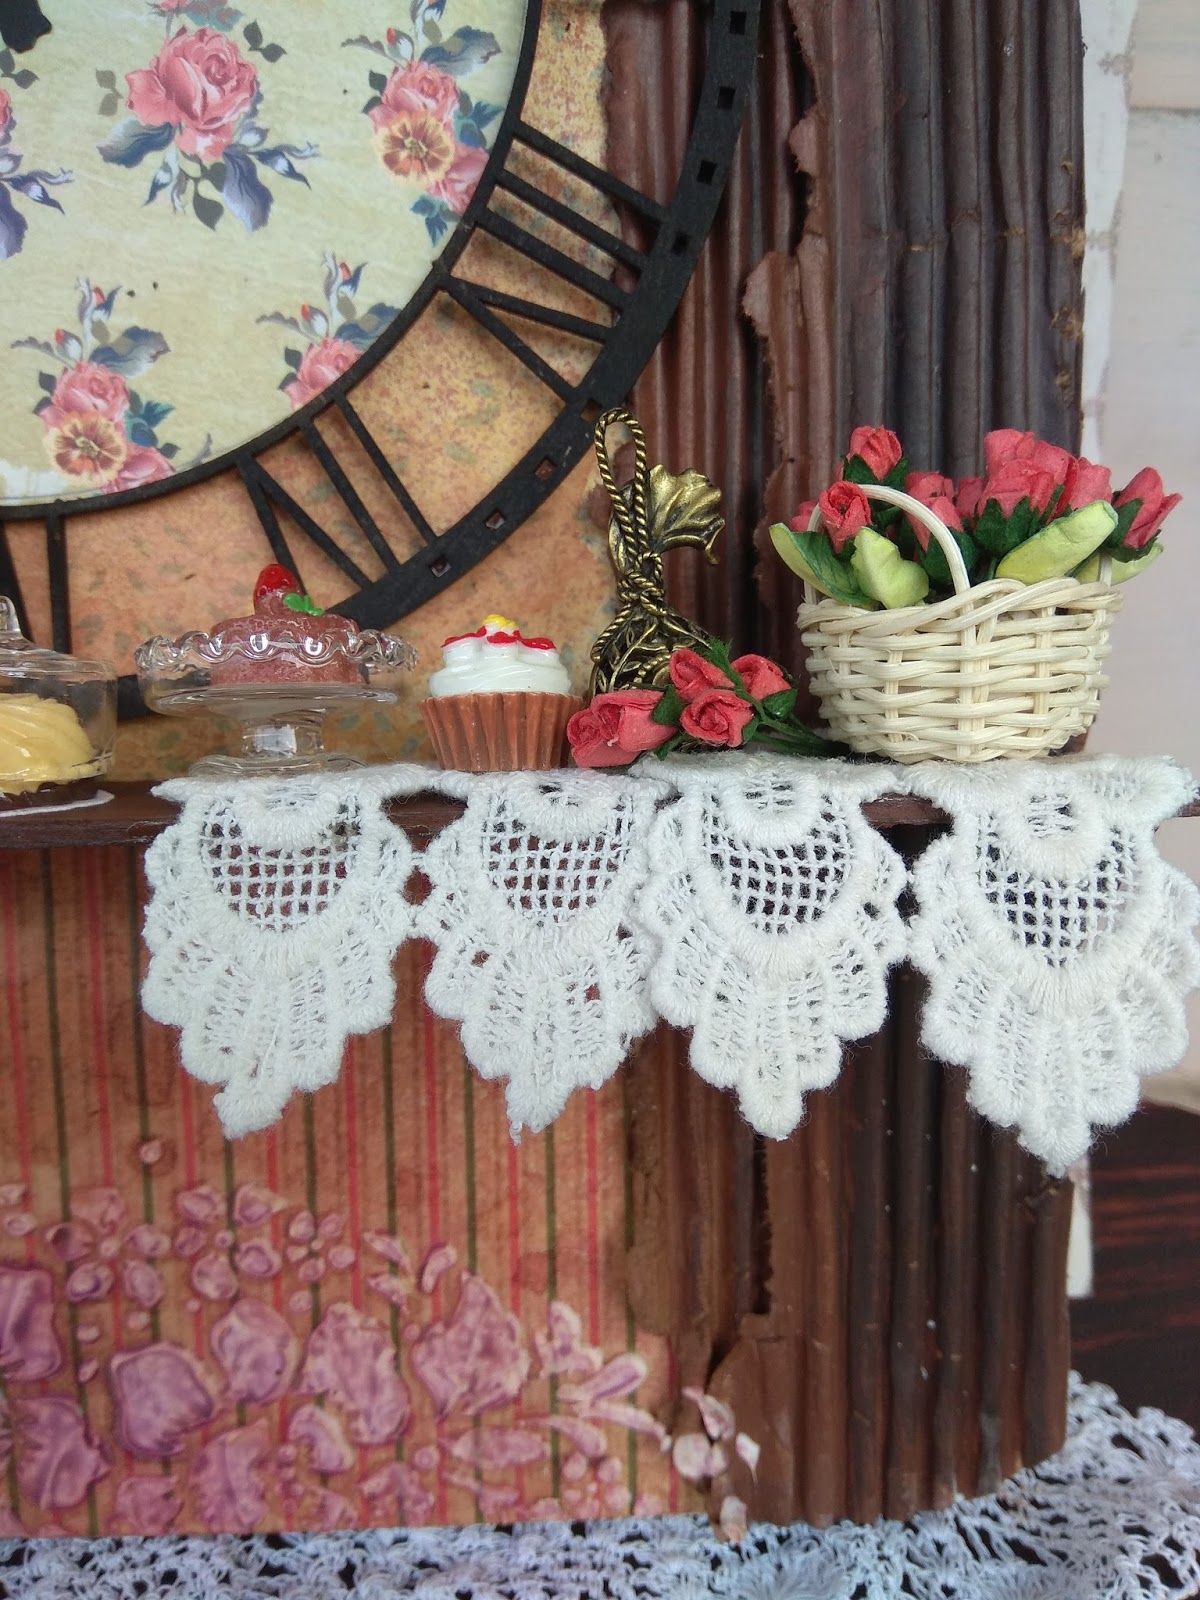
 9. Start arranging the things on the shelf. The basket has been filled with styrofoam/thermocol pieces . Add some white glue and fill with dry moss powder. Make miniature books with scrap pieces of chip board and pattern paper. Fill bottles with mini micro beads. The pink micro beads have been made by coloring the beads with drops of pink alcohol ink. Fill the pot with mini roses. Add cakes and cake stand. Adhere some scarp lace with glossy accents. Put more miniatures.

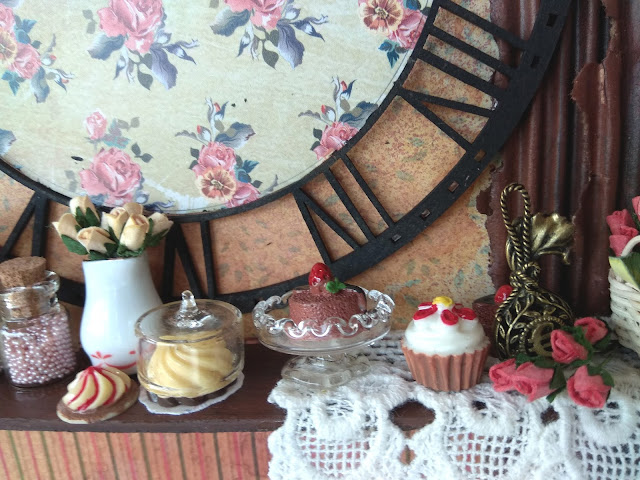
 The complete look of shelf when arranged.

Welcome to the Dress My Craft blog. It's Anita here with a super awesome wall clock project that can be made so quickly and makes an amazing gift item, all handmade by you.
Dress My craft has some awesome range of miniatures, mulberry flowers and many other products that makes crafting so much fun.
You can visit the store HERE to check the entire collection.
Today , I have a Wall clock made with the Teenie Weenies paper, Stencils and Miniatures.
This is a picture heavy post so do spare some time to go through the pictures.
This is a 10x12 inch wall clock made on a MDF board. The look is that of a shelf with little flower baskets, cake and cake stand , mini bottles filled with pearls etc. All the product details are given below. This project can be framed and used in a living room, kitchen or any other area of the house and looks very pretty indeed.


Step by Step method

1. Gather all the supplies from crafters Corner and Dress My Craft Store.
The mdf board measures 10" x 12 "

2. Cut pattern paper from Teenie Weenie paper pad. Choose two patterns . I have chosen a muted background for the top and a striped pattern for the bottom. The sizes are 9.5 inches x 10 inches for top and 3.5inches by 10 inches for the bottom.

3. Apply red tacky tape on the surface of the Mdf board.


5. Cut strips of corrugated paper about 2 inches broad and 10 inches long . You will require 4 pieces. One piece of chipboard 10" x 1". two triangles cut from 1" square. Colour all these with Folk art brown acrylic colour and black gesso.

6. Attach all the pieces on the board with Glossy accents.

7. Add some texture on the top and bottom of the base, using the stencil, modelling paste and spray some colour on top when the texture dries. I have used a combination of brown and deep magenta color. You can used distress spray or any other spray.

8. Cut a circle from the pattern paper and adhere on the top above the shelf with glossy accents. Colour a clock piece with black gesso and adhere as shown.


The finished Project.
Dress My Craft Products Used.
Other products from Crafters Corner
Folk art brown colour
So do visit the store for all your craft supplies. I hope you enjoyed here and will make projects with Dress My craft products. Thanks for stopping by.
Wow, what a rustic look in a jiffy!! Simple yet elegant!!
ReplyDeleteA modern Wall clock is the perfect blend of functionality and decorative elegance for any home. Vibecrafts offers premium wall clock designs crafted to enhance living rooms, bedrooms, offices, and hallways. Their stylish clocks add sophistication, modern charm, and artistic beauty while helping create organized, luxurious, and visually appealing interior spaces effortlessly.
ReplyDelete