
Hi Beautiful People
Shubhra here today, sharing a pretty in pink creation in pastel shades . I made this box with a circular mini album inside perfect for a baby shower or baby announcement. With the DressMyCraft products its pretty simple and easy to actually finish this off as I take you through a step-by-step tutorial. Its a picture heavy post that I hope you would really enjoy !
Starting with the complete look of the baby box, tutorial will follow thereafter . Enjoy !

Box lid with a mini dome and the gorgeous golden chains from DressMyCraft

Mini album inside the box
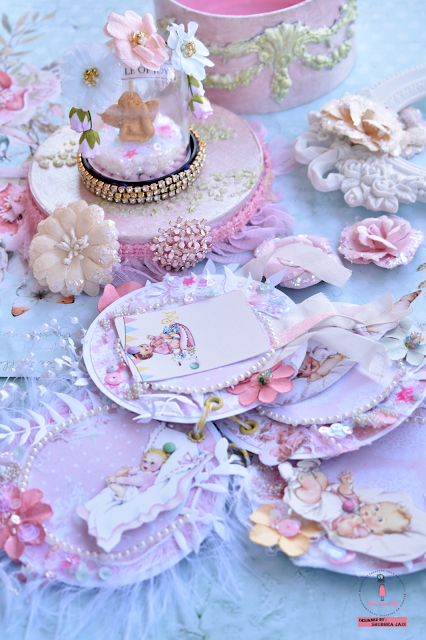
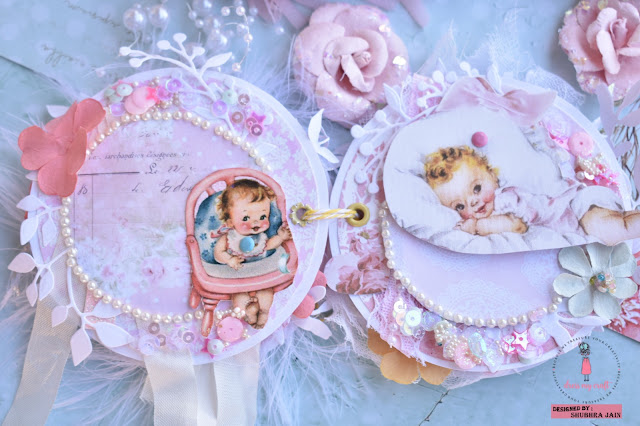
Details on the pages of album


Step-by-step tutorial


6. After this, I arranged some die cut leaves with the fussy cut images onto the bases from step 5.

7. I finished off the album by adding pearls, flowers, sequins, sparkling dust and micro beads.

8. For the box, I gessoed a paper mache box bought locally and added some ornate design with Prima mould and clay

9. Painted the exterior of box with Prima opal magic paints and interior with pink chalk paint

10. For the dome, here is all the material I required


12. To the box I have added some pink frill ribbon , flowers and a large bead on the front. I also did some stenciling on the lid and added opal magic paints to the texture paste.

I hope you like it and that I could inspire you in some way ! Below is a list of supplies used to make this
Supplies Used:
Charming baby girl Collection
Mini dome
Golden chain
Vintage script stencil
Charming baby girl motif sheet
Pink soda sequins
Micro beads pearl
Sparkling dust
Hugs
Shubhra
Shubhra here today, sharing a pretty in pink creation in pastel shades . I made this box with a circular mini album inside perfect for a baby shower or baby announcement. With the DressMyCraft products its pretty simple and easy to actually finish this off as I take you through a step-by-step tutorial. Its a picture heavy post that I hope you would really enjoy !
Starting with the complete look of the baby box, tutorial will follow thereafter . Enjoy !

Box lid with a mini dome and the gorgeous golden chains from DressMyCraft

Mini album inside the box

Details on the pages of album


Step-by-step tutorial
1. I started with circular white bases for my album and circular cut pink papers from Charming baby girl collection.

2. Next I glued the pattern paper on the white circular bases on both the sides. And I did fussy cut some images from same collection.

3. The fussy cut images were secured onto another smaller circle with a brad. Note: This circle is not shown in the picture above, I have cut it separately.

4. After this, I added some laces, fur, ribbons, gauze to the circular bases from step 2.


7. I finished off the album by adding pearls, flowers, sequins, sparkling dust and micro beads.


9. Painted the exterior of box with Prima opal magic paints and interior with pink chalk paint

10. For the dome, here is all the material I required

I colored the angel with inkagld, used thermocol to elevate the angel inside dome. Covered up thermocol in sequins and sides with glitter. The dome has a small hole on the circulference where I placed a tooth pick and golden chains to cover the black on the outside of dome. To pretty it up, I also added some flowers and buds to the exterior of dome.
11. And here is how the dome looked like


I hope you like it and that I could inspire you in some way ! Below is a list of supplies used to make this
Supplies Used:
Charming baby girl Collection
Mini dome
Golden chain
Vintage script stencil
Charming baby girl motif sheet
Pink soda sequins
Micro beads pearl
Sparkling dust
Hugs
Shubhra
It's Gorgeous !!
ReplyDeleteThank u so much ! :-)
ReplyDelete😮 Amazing! ❤️ love it!
ReplyDelete