
Hello Crafty Folks,
Manu here and I hope you are having a good time exploring all the new crafty stuff that Dress My Craft has launched in the previous months. Dress My Craft have had a very diversified collections this time with a lot of dies, gorgeous paper packs and some new punches. I'm sure you all must have had a good look at these by now and have already added the lovely collections to your stash!
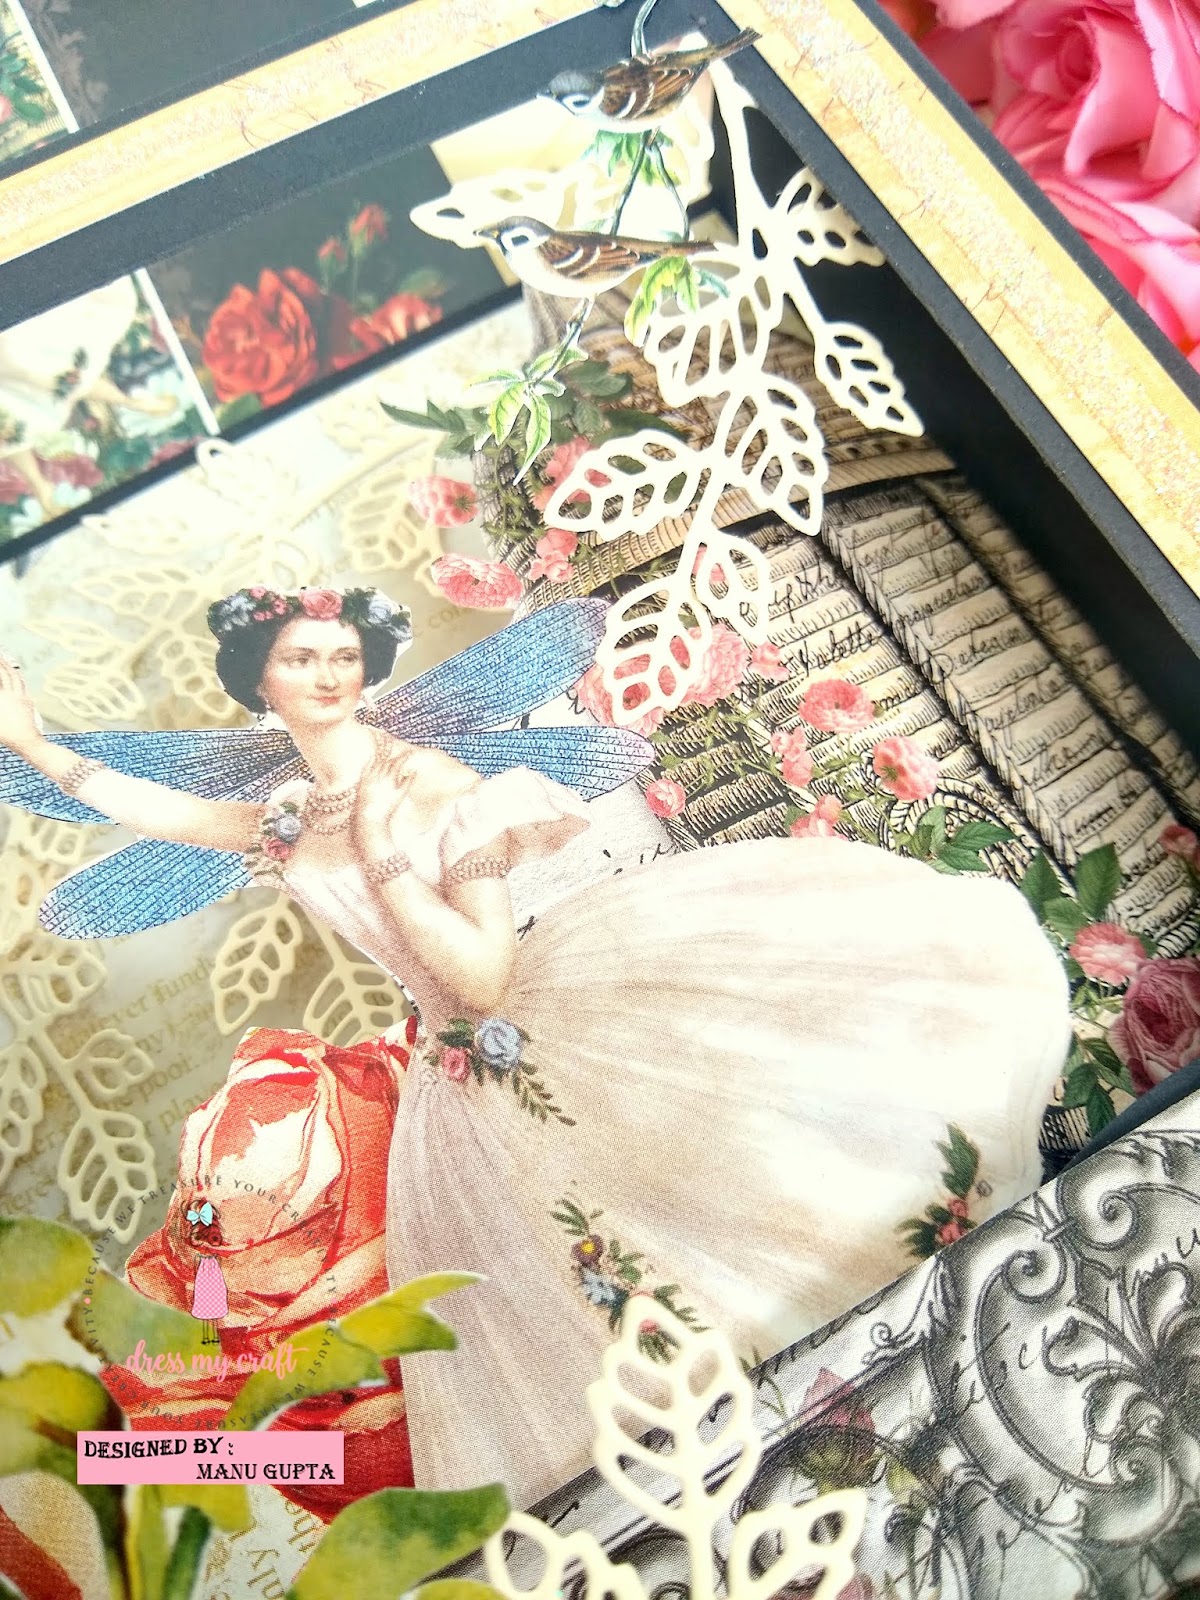
I have a 3D diorama card and a tutorial on how to make it using the Vintage Sage paper pack. This paper pack comes in two sizes, 12*12 and a 6*6 paper pack along with a super gorgeous Motif sheet. The motif sheets are such a added bonus and the lovely flower elements adds another charm to your projects.
Lets checkout a glimpse of the Diorama card before we learn it and then the post would have the complete look of this beauty for you.

This sure looks too tempting to learn, right.
Lets hop on!!
1. Take 2 cardstock pieces, 12*8 inches.

Score at both of the 12*8 cardstock piece at 2" and 10". This part we will overlap with one another to form a box.


Now take a cardstock piece of 2.5*10" and score at 1" and 9" mark and fold from the two ends. Also make a little mountain and valley fold and adhere these at the window frame, leaving a little gap from the window. Similarly cut another piece and adhere it at a little gap from the first piece.
You will now have a window with two cardstocks at a little gap.
Now adhere your back portion to this window panel to make a box.


Lets checkout the complete pics!! I totally loved making this little box!


I love making these shadow boxes since they are so cute and it's super duper easy to make them.


Happy Crafting
Manu here and I hope you are having a good time exploring all the new crafty stuff that Dress My Craft has launched in the previous months. Dress My Craft have had a very diversified collections this time with a lot of dies, gorgeous paper packs and some new punches. I'm sure you all must have had a good look at these by now and have already added the lovely collections to your stash!
I have a 3D diorama card and a tutorial on how to make it using the Vintage Sage paper pack. This paper pack comes in two sizes, 12*12 and a 6*6 paper pack along with a super gorgeous Motif sheet. The motif sheets are such a added bonus and the lovely flower elements adds another charm to your projects.
Lets checkout a glimpse of the Diorama card before we learn it and then the post would have the complete look of this beauty for you.

This sure looks too tempting to learn, right.
Lets hop on!!
1. Take 2 cardstock pieces, 12*8 inches.

Score at both of the 12*8 cardstock piece at 2" and 10". This part we will overlap with one another to form a box.

Now take one 12*8 piece and score at 2.75" and 9.25" inches (Basically .75" inside of the 2" and the 10" marks we did so that we can have a little boundary)
Flip over the cardstock and again score at .75" and 7.25" and now you will see that there is a .75" boundary on all the sides.
Now cut this inside of the carstock to have a little window as in the below pic.

Now take a cardstock piece of 2.5*10" and score at 1" and 9" mark and fold from the two ends. Also make a little mountain and valley fold and adhere these at the window frame, leaving a little gap from the window. Similarly cut another piece and adhere it at a little gap from the first piece.
You will now have a window with two cardstocks at a little gap.
Now adhere your back portion to this window panel to make a box.

Now comes the most interesting part, embellishment!!
Below is a WIP picture of how the box looks like before the final finish.


Checkout the uniform glitter at the edges.
I used my 6 mm tacky tape to get this uniform sheen, Adhere the tacky tape and then pour glitter over it, wipe using the finger (This helps in getting rid of the extra and also firmly adhering the glitter)


I love making these shadow boxes since they are so cute and it's super duper easy to make them.


I hope you liked the shadow box and would have been inspired to make one for yourself.
Give it a go!!
Products used from the store.
| 5. Trimmers 6. Scoreboard 7.Smooth Black Cardstock - 240 |
DMC products are available at www.crafterscorner.in for India customers and at www.dressmycraft.com for the International customers.
Facebook : www.facebook.com/dressmycraft
Instagram : https://www.instagram.com/dressmycraftLIVE Facebook Videos: https://www.facebook.com/crafterscornerlivetvYoutube : https://www.youtube.com/channel/UCExYyDP3Ag_uJk1MkxRz38w
Orders over 150$ are eligible for Free shipping internationally.
Happy Crafting
Manu
No comments:
Post a Comment