Showing posts with label tutorial. Show all posts

Sunday, 28 February 2021

TAG ALBUM WITH BOX LIVE CLASS

 Hey there people! This is crafter anu & I bring you a beautiful project today.

As the title reads, Its a tag album along with a coordinating box. It's an easy & quick project though very pretty looking. This class was taught online in a live class on Facebook which is absolutely free of cost. We are also providing you all with readymade kits for this project so you don't have to search for the materials individually. You can find the kit details at the end of this post.

This class is divided in two parts: 1. Tag album & 2. Box making

To watch the tutorials go to these respective links -

TAG ALBUM - https://fb.watch/3WYlQJu-kK/

BOX MAKING - (yet to be recorded)

Let's quickly have a peek of project


To make it further more easier for you all here's a brief measurement guide for this project.

TAG ALBUM MEASUREMENT GUIDE

BASE - for tags cut 5x cardstock at 2.5x5.25 inches

for hinges cut 4x cardstock at 1.25x4 inches, score at 0.5, 0.75 inches

PAGE1 : simple matting

PAGE2: matting + floral motif

PAGE3: pocket - cut cardstock at 2.5x3.5 inches, score from 3 sides at 0.5 inches

pocket insert size 3.75x2.25 inches plain cardstock

PAGE4: spinner element -cut 2x pattern paper at 2x2.25 inches

PAGE5: vellum belly band- cut vellum paper at 2x5 inches, tear edges.

insert - cut cardstock at 8x2.25 inches, punch it, score both sides at 1 5/8 inches

PAGE6: rose motifs

PAGE7: vellum envelope, cut vellum paper at 3.25x3.25 inches.

score A - 1 7/8 inches score B - 1 3/8 inches

PAGE8: cut cardstock at 4x2.25 inches, score at 3.25 inches

PAGE9: vellum half page, cut vellum paper at 3 7/8x2.25 inches. tear edges

PAGE10: pocket same as page 3

Belly band closure for tag album - cut vellum paper at 10x2.5 inches


That's all for the tag album, in case you still have any doubts you can write to us in comments below.

COORDINATING BOX MEASUREMENT GUIDE

Base - cut cardstock at 11x6 inches

box frame - cut 2x cardstock 4.5x6 inches, score (on 4.5 inch side) 0.5, 2, 2.5, 4 inches

& 2x cardstock at 4.5x4 inches, score (on 4.5 inch side) 0.5, 2, 2.5, 4 inches


KIT DETAILS:


𝗞𝗶𝘁 includes the following materials :

𝟱 ivory textured cardstocks 12x12"

𝟮 vellum sheets 180gsm 12x12"

𝟭 6x6 paper pad Mr. & Mrs. 

𝟭 motif sheet Mr. & Mrs.

𝟮 pcs of antique bronze brads 6mm

𝟮 pcs of magnets 10x1.5 mm

𝟲 pcs of die cuts

𝟭 hanging tag punch


𝗗𝗶𝗲 𝗰𝘂𝘁s include the following:

𝟯 vintage clock die cuts (black & gold) 

𝟮 couple die cuts (Black & gold) 

𝟭 handmade flower with leaves


We have two options in the kit with & without hanging tag punch

Kit price without tag punch is ₹699 only buy here https://bit.ly/2Mupms3

Kit price with tag punch is ₹1499 only buy here https://bit.ly/3dPAcEf

Book now to get this kit with free shipping


Thursday, 29 October 2020

Enjoy Little Moments-Treat Basket Tutorial

Dear Friends,

Shalini Pahwa here todayThe October month marks the beginning of the Winter season. It is also the beginning of a protracted festival season. It is the time of the year where we not only invite light into our homes by lighting our candles and fireplaces, but also bringing light into our lives by inviting our friends and family over to share in laughter, music, singing, dancing, food and drink.


We, of-course, cannot do so this year due to the pandemic, but nothing can still stop us from expressing our love for our family & friends.

With the idea of remembering your loved ones and giving them something that they cherish during the upcoming festivals, I have created this TREAT BASKET.


This basket has been created using 'Dress My Craft' pattern paper & dies. I have used beautiful "Dress My Craft-Me Collection-Chirping Bird". The basket is decorated with Daisy flowers, also constructed using Dress My Craft dies. Daisy flower represents innocence, new and fresh beginnings and life. So in these times, when the whole world seems to be covered in a sense of gloom, let such creations and gifts to your friends re-ignite the spirit of love that the world so desperately needs.


Below is the step by step procedure to make the Treat Basket :
Take card-stock size 9"x 8" and score at 2"on all four sides and cut, as seen on picture below...


Take patter paper from "Dress My Craft Me Collection-Chirping Bird" and adhere them all the sides.

Cut three Dress My Craft-Crochet Doily on white card-stock and color them using archival ink-majestic violet and distress ink-walnut stain and two on gold card-stock.  Cut two more Crochet Doily Die on white cardstock and cut them in half and adhere them on the base of the basket, as seen on picture...


For handles, cut one strip white card-stock size 1"x12" and pattern paper size .75" (cut two of these in pattern paper) and adhere it n white card-stock strip.
Cut eight crochet lace border die on white card-stock and make four pairs.

Cut leaves die on dress my craft pattern paper and distress the edges using archival ink-leaf green, using same ink-color at the back also.

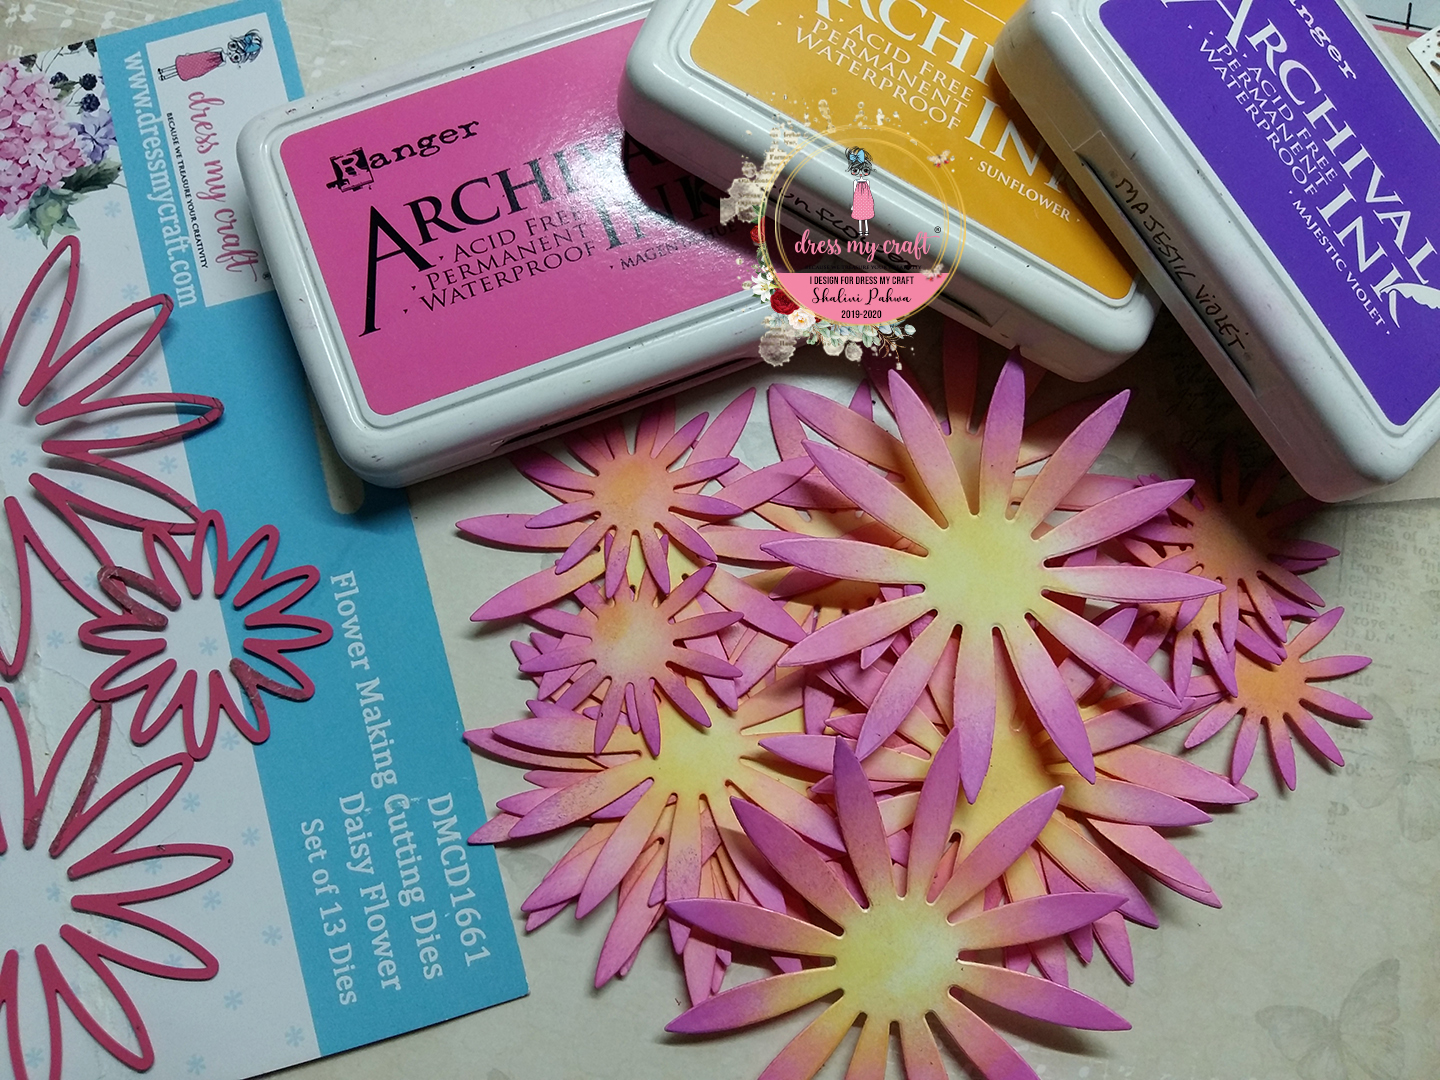
Cut few daisy die flower on Dress My Craft Soft Oriental paper and color them using archival ink-sunflower, magenta hue and majestic violet, soak them in water for few seconds and shape them using dress my craft-golf groove tool, Add flower pearls-golden at the centre.


Assemble all these elements together, add some ribbon and sequins and decoration of treat basket is ready...
I hope you all will love this tutorial and Do share your creations. Do also let me know how you like my creation.
Have A Great Day!!!

Sunday, 5 May 2019

Layered card Tutorial

Hi Friends

I am back with yet another post where I am sharing a layered card tutorial with the beautiful Vintage Saga papers from Dress My Craft.

As difficult they may seem to look at but layered cards or layering for that matter isn't too tough. Here is how, follow my simple instructions and you can sure start creating layers if you don't already do that and if you do, you may still get some more ideas !

Just a sneak peek into what we are upto


1. I have cut my base paper in white, red and a pattern paper from the paper pad.


2. Next I have layered the papers with foam tape to start building dimension


3. Now I have arranged an old torn paper and two strips of pattern paper as shown. On the left is a piece of paper from the same paper pad - Vintage saga and on the right - chipboard pieces from stash


4. Here you can see how I have arranged the elements from step 3 and have the elements for next step ready - heat embossed


5. I have arranged two flowers and heat embossed circles. A dancing girl and bird cage fussy cut from motif sheet have been arranged too. And I have die cuts from dress my craft and butterflies from motif sheet, heat embossed bulb image stamped on vellum ready for next step.


6.  In the semi final step here - I have arranged the die cuts and butterflies too.


And this is the final look - with some sparkling dust and micro beads from Dress My Craft


And some close ups ... ta da !


Supplies Used:


Hugs
Shubhra

DMC products are available at: 
www.crafterscorner.in for India customers and at www.dressmycraft.com for the International customers.

Facebook : www.facebook.com/dressmycraft
Instagram : https://www.instagram.com/dressimycraft

Friday, 12 April 2019

For you Always Tag book Tutorial

Hi Peeps

Shubhra here today bringing you a tutorial post on creating a tag book using the gorgeous For You Always Collection.

And this is how it looks ...


It's a long post , so let me cut short and take you directly through the process.

I started with 4 chipboard pieces cut in random sizes and shapes, as shown below.


Use pattern paper of your choice from "For You Always" Collection to cover the front and back of the tags.


For each tag, I have a picture showing the elements/ embellishments to be used on that tag and then a finished look that explains how I have arranged the elements. So next few pictures willbe self explanatory -

Tag 1


Finished look


Tag 2


Finished look


Tag 3


Finished look


Tag 4


Finished look


Below are the pictures for back side of the tags - i have simply added a sentiment to the back side.


And done ! Not are the steps only simple, trust me its super easy to make as well. This one straight goes as a present to DH and he plans to keep it on his office desk, how cute is that !!

Enjoy some more pics below and check out the supplies used


Supplies Used:


Hugs
Shubhra

DMC products are available at www.crafterscorner.in for the Indian customers and at www.dressmycraft.com for the International customers.

Dress My Craft, Social media presence:

FACEBOOK:

INSTAGRAM:

LIVE FACEBOOK VIDEOS:

YOUTUBE:

Orders over 150$ are eligible for FREE SHIPPING INTERNATIONALLY