Showing posts with label bipashak. Show all posts

Tuesday, 26 February 2019

Recycled Multilayerd Canvas

Hello wonderful Crafters,
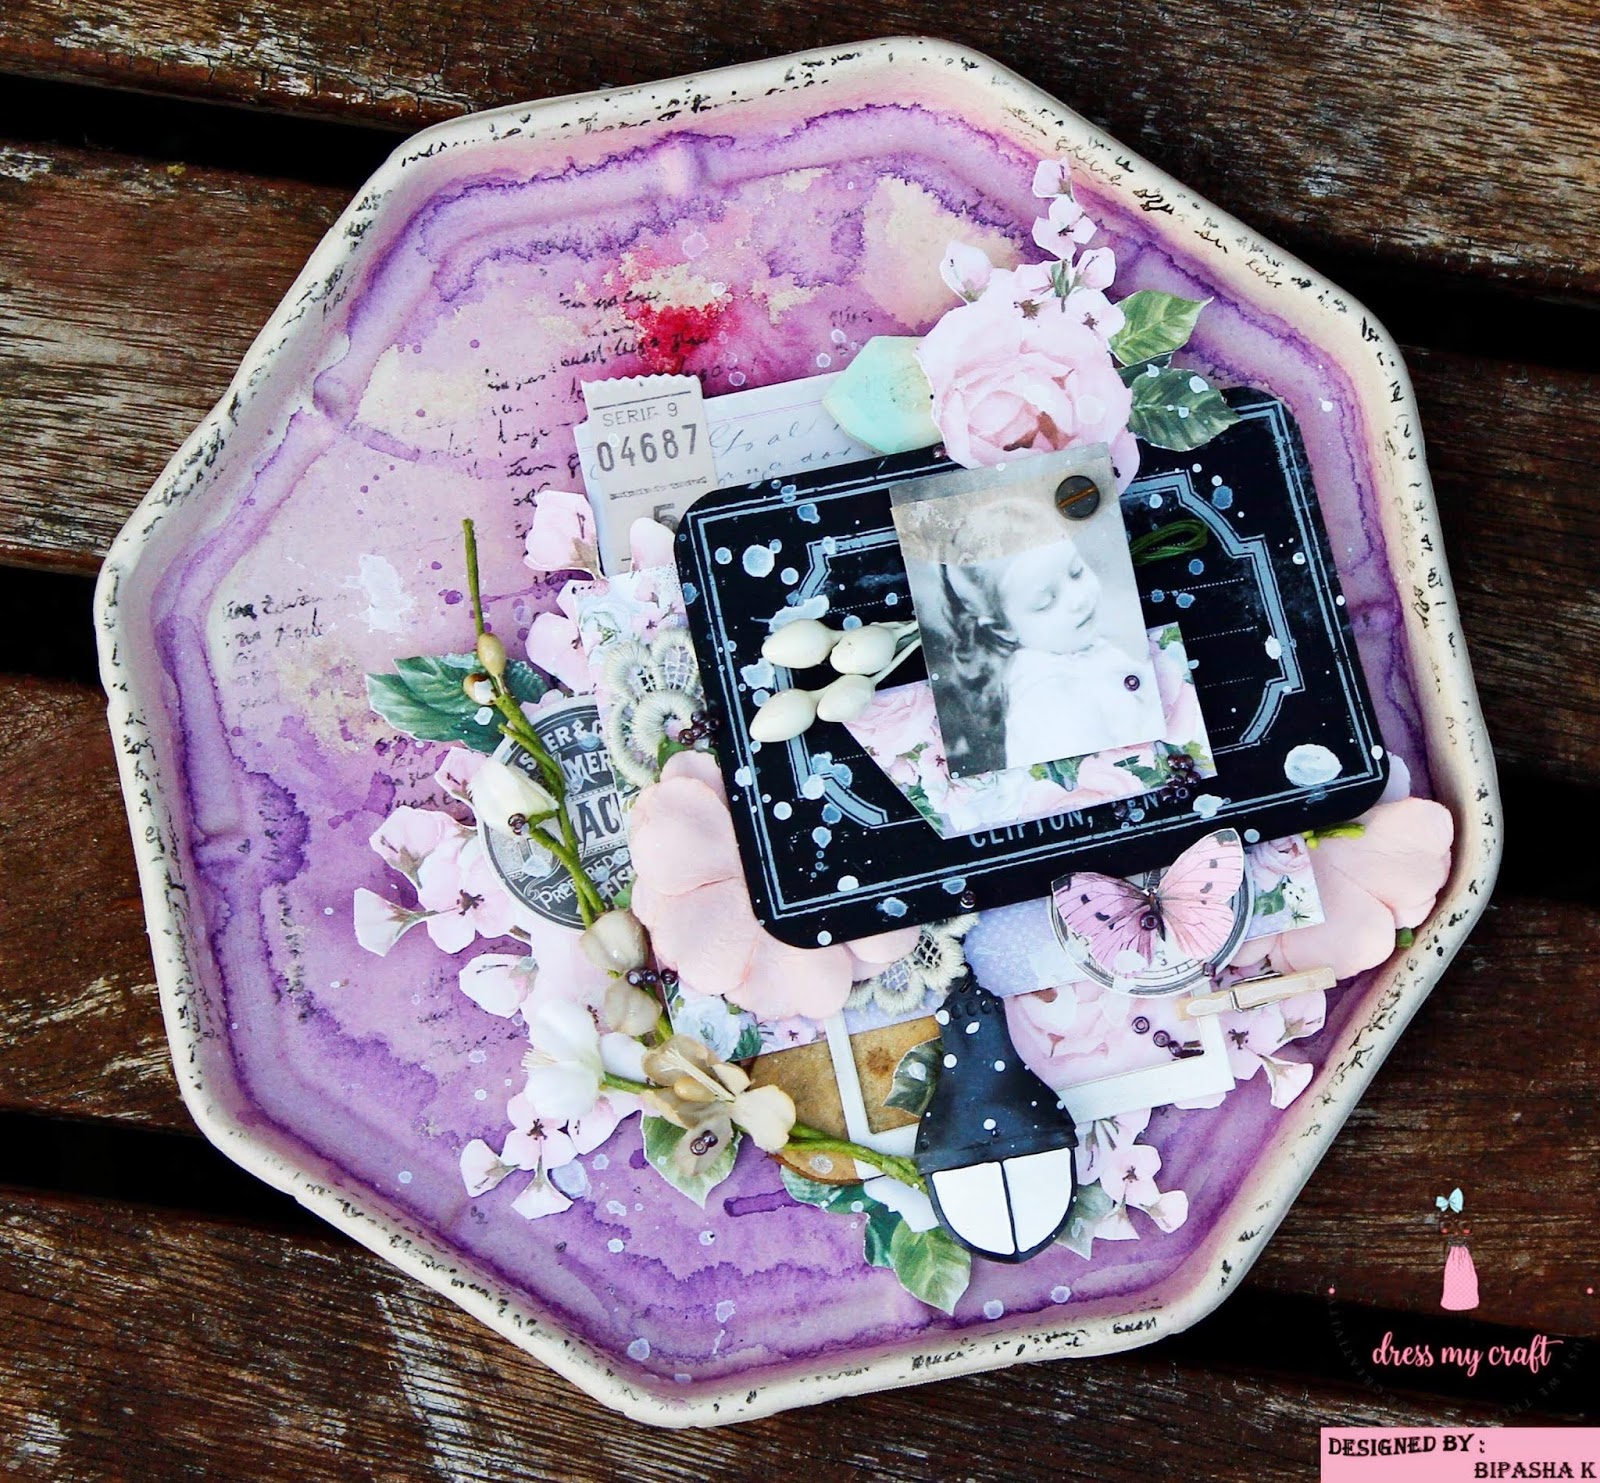
Today I am going to share a multilayered canvas. For the base, I have recycled a packaging plate. I have used the beautiful Floral Symphony collection kit from Dress My Craft to create the layers.
Steps:


1. I have fussy cut out some florals from Floral Symphony collection kit and some paper strips using Dress My Craft's mini trimmer.


2. Next, I sprayed some liquid acrylics on the base and added some script stamping once the paint dried.

3. Once I was happy with the background, I added the cut outs and elements with some 3D double sided tapes.

4. Next, I glued some beads, splattered some diluted gesso and we are done!


Hope you are inspired with the creation. Happy crafting!

Products used:
1. Floral Symphony Collection kit - https://www.dressmycraft.com/floral-symphony-collection-kit
2. Mini trimmer - https://www.dressmycraft.com/mini-paper-trimmer-2.5-inch-x-6-inch-1501
3. 3 IN 1 CORNER PUNCH- https://www.dressmycraft.com/3-in-1-corner-punch

DMC products are available at www.crafterscorner.in for the Indian customers and at www.dressmycraft.com for the International customers.
Dress My Craft, Social media presence:
FACEBOOK:
INSTAGRAM:
LIVE FACEBOOK VIDEOS:
YOUTUBE:
Orders over 150$ are eligible for FREE SHIPPING INTERNATIONALLY.

Friday, 30 November 2018

Circle MM Wall Decors using DMC Dies by Bipasha | Video Tutorial

Hello wonderful people,

Today I am going to share with you a pair or circle mixed media tags. I am not a tag person but I was drawn to create some pocket size layered designs using the newly launched die cuts from Dress My craft. I have created the flowers in these beauties using Dress My Craft's flower die and layered the base with their Circle nested die.
I must say these dies are my current faves, they just make crafting so easy and aligned ;)!


I have recorded a part of the creation demonstrating the use of these versatile dies. I hope this will inspire you to create multilayered floral projects.


Products:

Hydrangea Lawns 6x6 paper
Flower die 
Circle nesting die
Pollen
Banner punch
Groove golf tool

Happy Crafting,
Bipasha

Dress My Craft, Social media presence:

Facebook : www.facebook.com/dressmycraft
Instagram : https://www.instagram.com/dressmycraft
LIVE Facebook Videos: https://www.facebook.com/crafterscornerlivetv
Youtube : https://www.youtube.com/channel/UCExYyDP3Ag_uJk1MkxRz38w

DMC products are available at www.crafterscorner.in for India customers and at www.dressmycraft.com for the International customers.

Orders over 150$ are eligible for Free shipping internationally.

Saturday, 27 October 2018

Layout with Nesting Dies by Bipasha | Video tutorial

Hello wonderful people,

I am so thrilled to share with you my latest layout "Be a wild child" using the Dress My Craft Nesting Dies. It is so versatile and just a perfect addition in your crafting bin to ease the creation of  your circle cards, create multiple layers to dimensional/ altered projects or layouts - you name it!

If you know me, my unbeaten love for intricate and detailed artworks won't surprise you! I have been eyeing on a Nesting Circle die for a while now, as it is such a breeze to die cut out tons of frames, circles and negatives without worrying much about finding any other coordinating embellishments for a big project.

I have also used the beautiful papers from Floral Symphony Collection kit from the Dress My craft to create my layout. Here are some photos and please scroll to the end for the process video of this creation.


Video:


Products from Dress My Craft:
Floral Symphony collection kit
Nesting dies 

The fabulous new dies of Dress My Craft are such must haves for all type of crafters starting from CAS to mixed media artists and I hope my video was able to inspire and spark your creativity.
Happy Creating!!
Bipasha

Dress My Craft, Social media presence:

Facebook : www.facebook.com/dressmycraft
Instagram : https://www.instagram.com/dressmycraft
LIVE Facebook Videos: https://www.facebook.com/crafterscornerlivetv
Youtube : https://www.youtube.com/channel/UCExYyDP3Ag_uJk1MkxRz38w

DMC products are available at www.crafterscorner.in for India customers and at www.dressmycraft.com for the International customers.

Orders over 150$ are eligible for Free shipping internationally.

Thursday, 27 September 2018

Mixed Media Canvas - DressMyCraft Punches with Bipasha | Video Tutorial


Hello wonderful crafters,

I hope you all have been having a gala creative time with the latest launch of the DressMyCraft crafting tools. I am in awe of their versatility and super affordable prices. Today I am going to share with you a Mixed Media Canvas that I created using the DressMyCraft papers and the super-fabulous punches! It's very intriguing how you can create multiple paper embellishments using these punches adding layers in no time and giving a dimensional aspect to your project. So without further ado, let me share you the photos and the recorded creative process [at the end - please scroll down].


I can't wait to see how you draw some inspiration from the video and create your beautiful projects using these super versatile punches!

Video :


Products used:
3 in 1 corner punch
Banner punch
Magnolia 6x6 paperpad
Hydrangea-lawn-collection-kit


Happy crafting,
Bipasha


Dress My Craft, Social media presence:

Facebook : www.facebook.com/dressmycraft
Instagram : https://www.instagram.com/dressmycraft
LIVE Facebook Videos: https://www.facebook.com/crafterscornerlivetv
Youtube : https://www.youtube.com/channel/UCExYyDP3Ag_uJk1MkxRz38w

DMC products are available at www.crafterscorner.in for India customers and at www.dressmycraft.com for the International customers.

Orders over 150$ are eligible for Free shipping internationally.

Monday, 30 July 2018

Mini Card Book using Floral Symphony [Tutorial]

Hello wonderful people,
How have you been? This is Bipasha here with a cute creation using the Floral Symphony collection.
I can never get tired of using this beautifully designed papers in my artworks. Today, I have created a mini envelope-card stack and I have a step-by-step to walk you through the process!
This is a picture heavy post . So sit back, grab your cuppa and enjoy!


Steps::
1. Create 4 nos. of  3x4.5" envelopes and create a slit at one side. Create 4 nos. of mini cards of size 2.5x4".

2. Cut a piece of 12x4.5" strip from one of the pages of the 12x12" Floral Symphony paperpad and score 7 lines in the centre 1 cm apart from each other. This is the hinge that will hold the envelopes.


3. Fussy cut out some flowers from the Floral Symphony Motif sheets. I have also cut out the ATC cards from the last pages pf the 12x12" pad.


4. Once I grabbed everything for the next phase of my design, I started with covering the kraft areas of my envelope with the ATC cards. I have left 3mm of kraft area on all sizes to lift the designs in the adhered patterned paper and build an interesting contrast.


5. For the enclosure I adhered another 4.5x8" piece on one side and scored it at 5" and 6" lengthwise (refer the above pic).  Next I added some seambinding and a brad to add some softness to my book.


6. And finally the book was complete after layering with the fussy cut flowers, some prima flowers, and other elements from my stash,. Last but not the least I added some magical touch with the mini pearls, sequins, and sparkling dust. It helped me to blend everything together.


Here are my project pictures and some close ups!


Products:

Hope you all enjoyed going through my creation as much as I enjoyed creating it.
Happy crafting till I see you next time.
Hugs,
Bipasha

Wednesday, 27 June 2018

Floral Fantasy Layout with Mini Tutorial!

Hello my crafty angels!!

I am sure you guys had a gala time seeing all the fabulous creations of the newly launched DMC's paperpads by my fellow design teammates. I am here today with my take on the newly launched Dress My Craft's, Floral Fantasy, - perfect combo of beautiful designs in soft subtle hues. It comes in 2 sizes: 6"x6" and 12"x12".


Some quick tips and tricks :
-This paperpad is very versatile as it gives us a medley of soft plain designs as well as some intricate elements for fussy-cutting to create a variety of products
- I started with two plain contrasting shades.


- Next, I fussy cut out the elements to bring the focal point in one specific position of the layout.


- Finally I added som lace trims and elements from my stash with some splatters of diluted white gesso to blend in the look
- Finish it with a quote
- Easy ad quick!

Here is a full view of the layout:


Product from the store