Showing posts with label shabby chic cards. Show all posts

Saturday, 26 October 2019

Cards with Romantic roses collection

Hello friends,

Kavitha with you here today.I made a couple of soft and romantic cards using gorgeous "Romantic roses" paper pad. Before we go onto the details i would like to share my social media link where you can find more of my works:
Blog : https://kalalayaa-artclub.blogspot.com/
Instagram : https://www.instagram.com/s_kavi/

This paper pad has so many possibilities of  color combination,i went for pink/grey and green/grey combination with hints of red which i feel makes the card pop.
I love adding lots of layers and details to my cards and the element sheets helps a lot to do that.


I hope you enjoyed my post today and got some inspiration to use the lovely paper pad.Check out our  beautiful and versatile range of our paper pads here.

Products used:
Romantic roses 12*12 paper pad
Romantic roses motif sheet
Foliage leaves #2
Foliage leaves #4
Foliage leaves  #9

Happy crafting,
Kavi

Dress My Craft, Social media handles:
Facebook : www.facebook.com/dressmycraft 
Instagram : https://www.instagram.com/dressmycraft 
Youtube : ​https://www.youtube.com/dressmycraft


Dress My Craft products are available at

For Indian customers -​www.crafterscorner.in 
For International buyers - www.scrapbook.com

www.dressmycraft.com( FREE SHIPPING ABOVE 150$ WORLDWIDE)

Friday, 27 September 2019

Video Tutorial- Shabby Chic Tall Note Cards with Romantic Roses Papers

Hello Everyone!
Ruchi here from Ruchi's Crafeteria and I'm back with my another project as Brand Ambassador for Dress My Craft.

First, I'm sharing my social media links where you can explore my crafty work.
YouTube
Blog
Facebook
Instagram
Pinterest

So let's move to today's post. I've created a set of Tall Note Cards in Shabby Chic style using Dress My Craft 'Romantic Roses' paper collection along with so many beautiful products and tools.


Step by step video tutorial is here to enjoy!! Hope you like it :)


A Layout 'Vintage Vibes' with Dress My Craft Vintage Saga paper pack is HERE to explore.

You can watch my DT kit reveal video HERE   ..I'm sure you will enjoy watching flip through of lots of beautiful paper collections and gorgeous sequins and paper tools by Dress My Craft.

Supplies used:
Romantic Roses Paper pack
Romantic-Roses-motif-sheet
Pink Smoke Paper pack
Pink Smoke motif sheet
Foliage & Leaves #7 cutting dies
Classic Doily die
Flower Pearls- Snow White
Flowers Pearls- Green
Multi-purpose-scoring-board
Teflon-Bone-Folder #3
Paper Trimmer
Non-Stick-Craft-Mat-Thick

I hope you like today's project.
Happy Crafting!!
Ruchi

Dress My Craft, Social media handles:
Facebook: www.facebook.com/dressmycraft
Instagram: https://www.instagram.com/dressmycraft
Youtube: https://www.youtube.com/dressmycraft

Dress My Craft products are available at
For Indian customers -www.crafterscorner.in
For International buyers - www.scrapbook.com

www.dressmycraft.com ( FREE SHIPPING ABOVE 150$ WORLDWIDE)

Friday, 19 April 2019

Get creative with dress my craft scoreboard | Tutorial

Hello everyone,
Hope you are doing great.
This is Meher from Meher Creations back with another post on different ways you can use Dress my craft scoreboard. We are focusing on scoreboard and bone folders this month to show you different possibilities on how you can use them.
Well, In this post I will be sharing some creative ways in creating textures on cards and other projects.


1. Layered card with shaker window


2. Card with a bunch of grapes

How to create:
  • Create a card measuring 4*6 inches on a white cardstock.
  • Cut a piece of pattern paper measuring 3.5 by 5.5 inches.
  • Cut a piece of cardstock again measuring 3 1/4 by 5 1/4 inches. Score the whole cardstock at every 1/8 inch to give a nice texture.
  • Pick a yellow pattern paper and cut a window panel on it and adhere foam tape behind. 
  • Layer all the pieces together.
  • Apply some equal amount of glue at the center of the card and start arranging round pearls randomly to give a natural grapes look.
  • Pick some leaf chipzeb pieces and color them in green using Prima chalk edgers.
  • Stick them on top of the bunch and tie a bow using twine.
  • Add a sentiment and complete your card. 


3. Banner Card

How to create:
  • Create a base card measuring 5*4 inches.
  • Pick the cover of the charming baby girl paper pad and cut some colorful glossy pieces to create banner. 
  • Adhere a piece of twine on the card and allow it to dry. 
  • Stick foam tape behind all the tiny banner pieces and adhere it on to the card.
  • Add a sentiment or a stamped image to complete the card.


4. Pocket envelope

How to create:
  • Create a base card measuring 4*6 inches.
  • Score at 1/4 inch on both the sides
  • Cut a strip from one part of the card.
  • Score at 1.5 inch to fold the envelope.
  • Stick the 1/4 inch area on to the other side of the card. That makes a pocket envelope.
  • Cut pattern papers and adhere it on the envelope.
  • Pick two brads and fix it at the centre of the envelope and tie a twine to make the closure.
  • Pick some images from the motif sheet and embellish it using foam tape. Add a sentiment to complete the envelope and fill some tags in it.


List of materials used: 
DMC products are available at: 
www.crafterscorner.in for India customers and at www.dressmycraft.com for the International customers.

Facebook : www.facebook.com/dressmycraft
Instagram : https://www.instagram.com/dressimycraftLIVE Facebook Videos: https://www.facebook.com/crafterscornerlivetvYoutube : https://www.youtube.com/channel/UCExYyDP3Ag_uJk1MkxRz38w

Orders over 150$ are eligible for Free shipping internationally.

Thursday, 21 February 2019

3D Diorama using the Vintage Saga + Tutorial

Hello Crafty Folks,

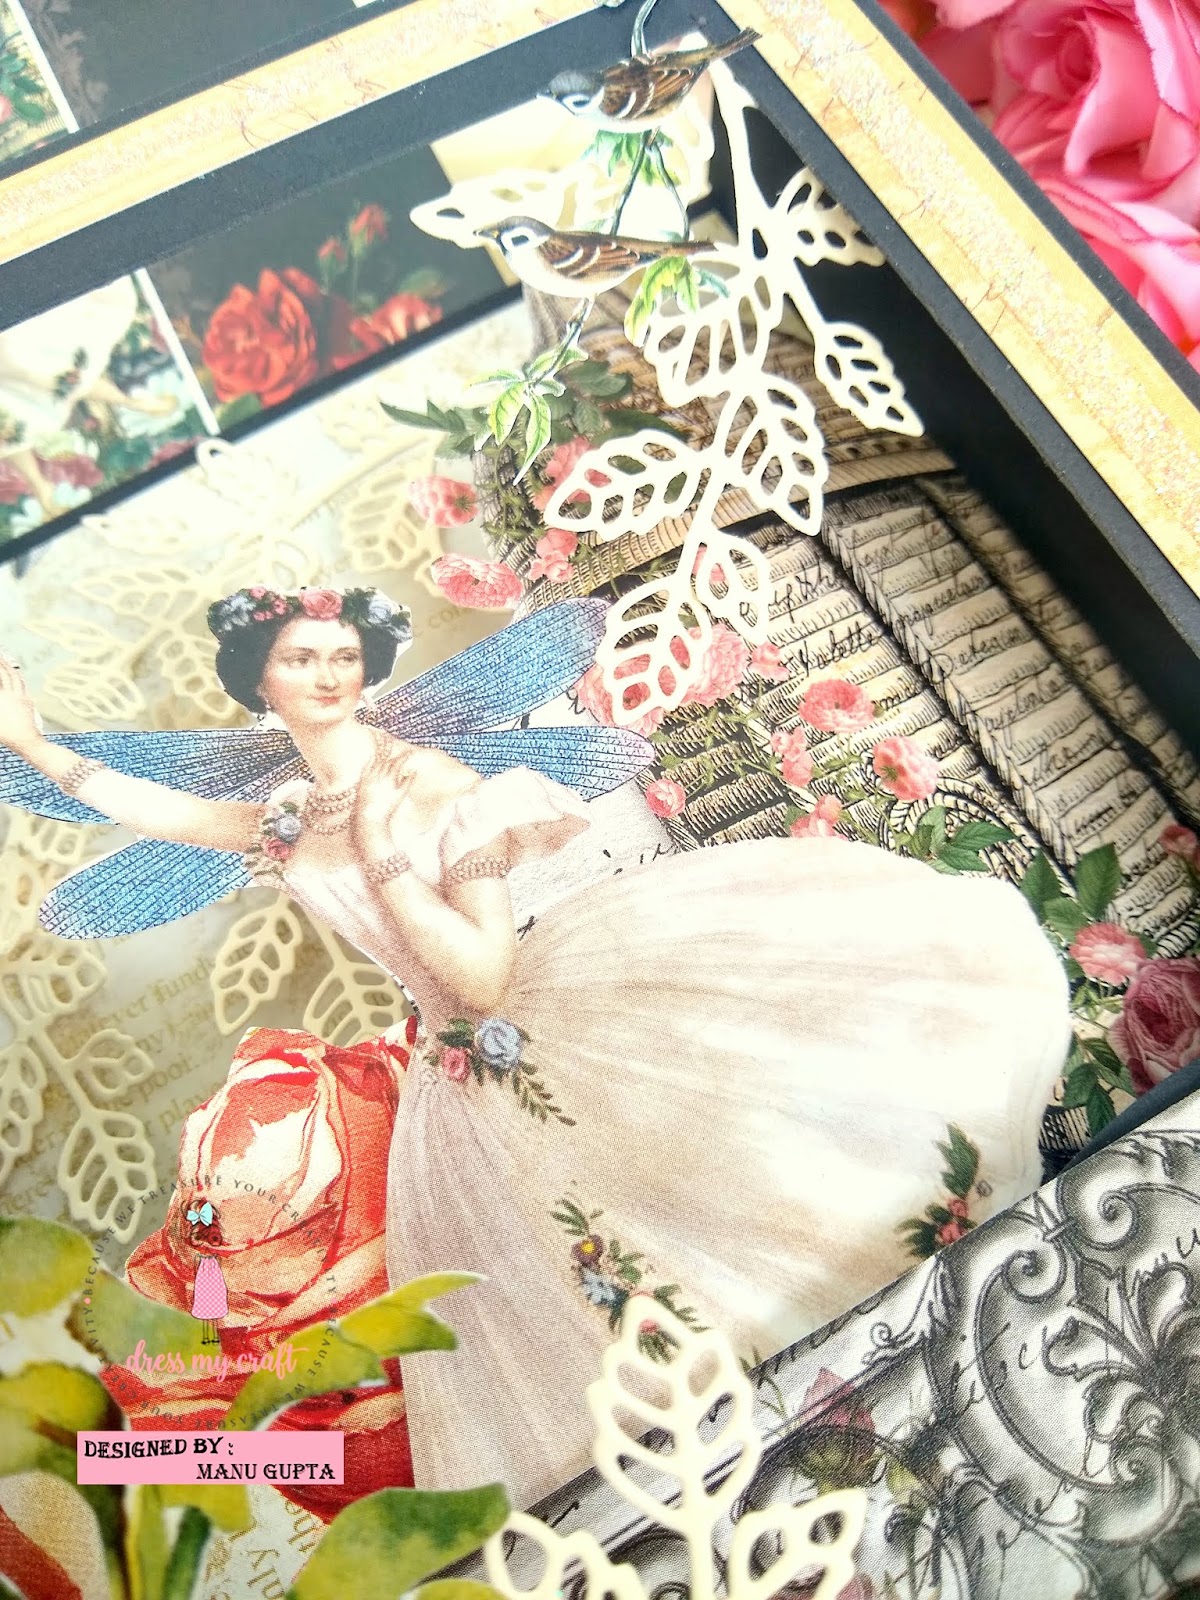
Manu here and I hope you are having a good time exploring all the new crafty stuff that Dress My  Craft has launched in the previous months. Dress My Craft  have had a very diversified collections this time with a lot of dies, gorgeous paper packs and some new punches. I'm sure you all must have had a good look at these by now and have already added the lovely collections to your stash!

I have a 3D diorama card and a tutorial on how to make it using the Vintage Sage paper pack. This paper pack comes in two sizes, 12*12 and a 6*6 paper pack along with a super gorgeous Motif sheet. The motif sheets are such a added bonus and the lovely flower elements adds another charm to your projects. 
Lets checkout a glimpse of the Diorama card before we learn it and then the post would have the complete look of this beauty for you.


This sure looks too tempting to learn, right.
Lets hop on!!


1. Take 2 cardstock pieces, 12*8 inches.


Score at both of the 12*8 cardstock piece at 2" and 10". This part we will overlap with one another to form a box.


Now take one 12*8 piece and score at 2.75" and 9.25" inches (Basically .75" inside of the 2" and the 10" marks we did so that we can have a little boundary)
Flip over the cardstock and again score at .75" and 7.25" and now you will see that there is a .75" boundary on all the sides. 
Now cut this inside of the carstock to have a little window as in the below pic.


Now take a cardstock piece of 2.5*10" and score at 1" and 9" mark and fold from the two ends. Also make a little mountain and valley fold and adhere these at the window frame, leaving a little gap from the window. Similarly cut another piece and adhere it at a little gap from the first piece.

You will now have a window with two cardstocks at a little gap.
Now adhere your back portion to this window panel to make a box.


Now comes the most interesting part, embellishment!!

Below is a WIP picture of how the box looks like before the final finish.


 Lets checkout the complete pics!! I totally loved making this little box!


Checkout the uniform glitter at the edges.
I used my 6 mm tacky tape to get this uniform sheen, Adhere the tacky tape and then pour glitter over it, wipe using the finger (This helps in getting rid of the extra and also firmly adhering the glitter)


I love making these  shadow boxes since they are so cute and it's super duper easy to make them.


I hope you liked the shadow box and would have been inspired to make one for yourself.
Give it a go!!

Products used from the store.
5. Trimmers
6. Scoreboard
7.Smooth Black Cardstock - 240   

DMC products are available at www.crafterscorner.in for India customers and at www.dressmycraft.com for the International customers.

Facebook : www.facebook.com/dressmycraft

                                  Orders over 150$ are eligible for Free shipping internationally. 

Happy Crafting 
Manu


Tuesday, 19 February 2019

Shabby chic cards | In my heart

Happy Tuesday,
Hope you are doing great.
This is Meher from Meher Creations back with another post created using the super gorgeous In my heart paper collection. I've created two shabby chic cards loaded with heavy embellishments. The thickness and the quality of the paper really gives a neat and sturdy effect to your projects. It is always fun creating cards and I absolutely loved the way these cards turned out.

This is my first card created with a lot of layers of die cuts, filler chippies and punched borders. I also created a bow using Dmc lace and centered it with a bling.

The beautiful key with a heart is the center of attraction. I've fussy cut the same from the motif sheet.


I'm a sequins lover and I always try to find opportunities to use sequins in my projects in different ways. You will find a layer of sequins in this card which very well goes with the back ground color of my card.

This is one of my favorite dies from Dress my craft. I've given a shadow effect using two couple die cuts to add more depth to my card.

I've created this cute dream catcher using these feathers fussy cut from the motif sheet. 

List of materials:
Hugs and kisses die
In my heart paper collection
In my heart motif sheet
Flowers
Art stones
Micro beads
Sequins
Hemp cord
Chippies
Floral oriental paper collection

DMC products are available at: 
www.crafterscorner.in for India customers and at www.dressmycraft.com for the International customers.

Facebook : www.facebook.com/dressmycraft
Instagram : https://www.instagram.com/dressmycraftLIVE Facebook Videos: https://www.facebook.com/crafterscornerlivetvYoutube : https://www.youtube.com/channel/UCExYyDP3Ag_uJk1MkxRz38w

Orders over 150$ are eligible for Free shipping internationally.